
Travel scrapbook template with map and ticket spaces
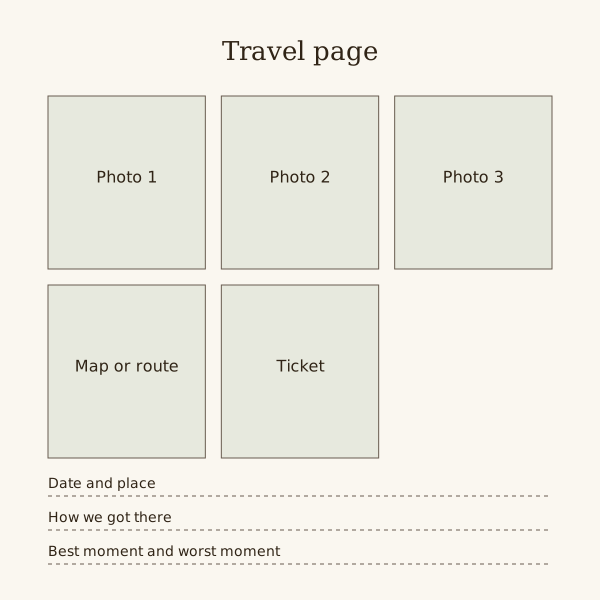
Use one page per stop: three photo boxes, a box for a map or route sketch, a box for a ticket, and lines for date, place and how you got there. Print a copy for each stop.
A travel book is easier to finish when every stop gets the same page. You fill in the same boxes each time instead of designing from scratch after a long day.
The download is a square SVG layout guide. Scale a test print to the paper your printer accepts, then measure the boxes; an 8-inch or 12-inch finished page needs a matching print setup.
Fill the pages online instead
Drop your photos onto editable pages and download a PDF.
Count the copies before you print
Count the stops, not the days. A ten-day trip with three bases may need three to six pages, while a rail trip through eight towns needs eight.
Add one copy for getting there and one for coming home. Print two spares for the stop that turns out to need more room.
Give each box one job
Keep the boxes in the same roles on every page. A reader then knows where to look, and you never have to decide again.
- Box 1: the widest view of the place.
- Box 2: the people you were with, faces large enough to recognise.
- Box 3: one close detail, such as a sign, a plate of food or a door.
- Box 4: a cut piece of a paper map, or the route drawn by hand.
- Box 5: a ticket, receipt or wristband from that stop.
Fill the lines on the trip, the boxes later
Dates and the way you travelled fade from memory long before the photos do. Write the three lines on the evening itself, even if the boxes stay empty until you are home.
Keep an envelope per stop for paper. Write the place on the front and drop that day's tickets inside before bed.
When the ticket or map will not fit
Use a copy of a map in the box, or a loose original in a separate pocket. Fold-outs need enough room to open without catching the next page.
For phone tickets, use a redacted copy showing only the route and time you want. Remove booking references, names and barcodes before sharing it.
Print till receipts can fade over time. Photograph or scan them soon after the trip and keep the image with the stop's photos.
The map and ticket boxes are placeholders, not standard ticket sizes. Trace an oversized keepsake on scrap paper and test it before choosing a pocket or reduced copy.
Steps
List the stops
Write every place you stayed or spent a full day, in order. That list is the number of pages, plus one each for the trip out and the trip back.
Label each printed copy
Print one scaled test and measure each box. Check a map and ticket against it, then label one copy per stop and place them in route order.
Fill the boxes in order
Start with box 1, the wide view, and finish with box 5, the paper. Choosing the place photo first makes the detail and ticket choices quicker.
Check the run of pages
Lay the finished pages out in route order. If two stops look the same, swap one wide view for a picture only that place could have produced.
Questions
Can I use this travel template for a digital book?
Yes. Open the SVG in an editor that accepts it, or copy its box positions onto a square digital page. Keep the same five roles for every stop.
What if I have more than three photos from one stop?
Choose the best wide view, people and detail for the template page. Put the extras on a plain grid page that follows it, so the template stays readable.
What if I have no ticket for a stop?
Use a photograph of a keepsake, a copied label or your own route sketch in box 5. Keep food and plant material out of the album, or leave the box empty.