
Scrapbook photo corners: which kind and how to place them
Photo corners hold a print by its four corners, so no glue touches the photograph and it can come out again. Fix two diagonal corners first, slide the print in, then add the other two.
Corners suit original prints you may want to remove, scan or pass on later. The adhesive goes on the corner and the page, never on the photo.
The Library of Congress advises against tape, glue or other adhesives on photographs, and against magnetic or self-adhesive album pages.
Make a digital scrapbook
Add your photos and keepsakes in tbf scrapbook, then arrange them on the pages.
Kinds of corner
Paper corners come in black, white, kraft and metallic. Clear polyester corners hide less of the image. Both usually come with adhesive already on the back.
- Clear corners for prints with detail near the edges.
- Black or kraft corners on dark or brown pages, where they read as part of the design.
- Larger corners for heavy card prints and postcards.
- Metal corner protectors are for book covers, not for holding photos.
When corners are the wrong choice
Skip corners for a print that is curled, cracked or soft at the corners. The National Park Service warns corners can bend or damage a weak object. A clear sleeve holds it instead.
Skip them for a print you plan to trim. A trimmed photo is a copy, and a copy can be fixed with ordinary photo-safe adhesive.
Placing four corners square
Lay the print on the page and mark its corners lightly in pencil. Fix the top-left and bottom-right corners on the marks, slide the photo in, then fix the other two.
Leave a hair of slack. A print gripped tightly bows when the page flexes; a loose one slips out when the album is turned.
Making your own corners
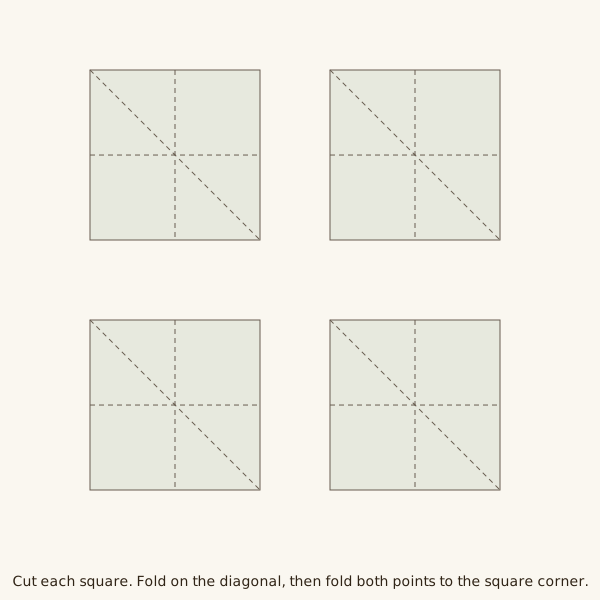
The National Park Service describes folding a half-inch strip of unbuffered acid-free paper into a row of triangles, cutting them apart and taping each to the page.
For clear corners it cuts a 2-inch square of polyester film to make a 1-inch corner. Its guidance names unbuffered paper because some colour prints react to alkaline paper.
Steps
Choose size and colour
Pick corners that cover about a centimetre of each photo corner on standard prints. Hold one against the print to see what it hides.
Mark the position
Set the print where it will sit and tick each corner in soft pencil. Keep the marks small enough to be covered by the corners.
Fix the diagonal pair
Peel and press the top-left and bottom-right corners on their marks. Slide the print into both before fixing anything else.
Close the frame
Slip the last two corners onto the photo's free corners, then press them down. Lift the print slightly to check it moves but stays.
Questions
Are photo corners better than glue for old photos?
For originals, yes: nothing sticks to the photo and it can be removed. Glue is fine for copies you have printed for the book.
Do photo corners work in a digital scrapbook?
Only as a drawn effect. On a digital page they mark the photo's edges visually but hold nothing, so use them where they help the eye.
Why does my photo bow between the corners?
The corners are too tight for the print. Peel one corner and refit it a millimetre further out so the photo sits flat.